 One of the things that Ty taught in his writing class was story maps. Basically, (in the form he was teaching us) they’re a simple device for planning a basic comic script. Obviously, story maps aren’t unique to comic writing, but Ty’s technique for using them is pretty specific to mainstream comics publishing.
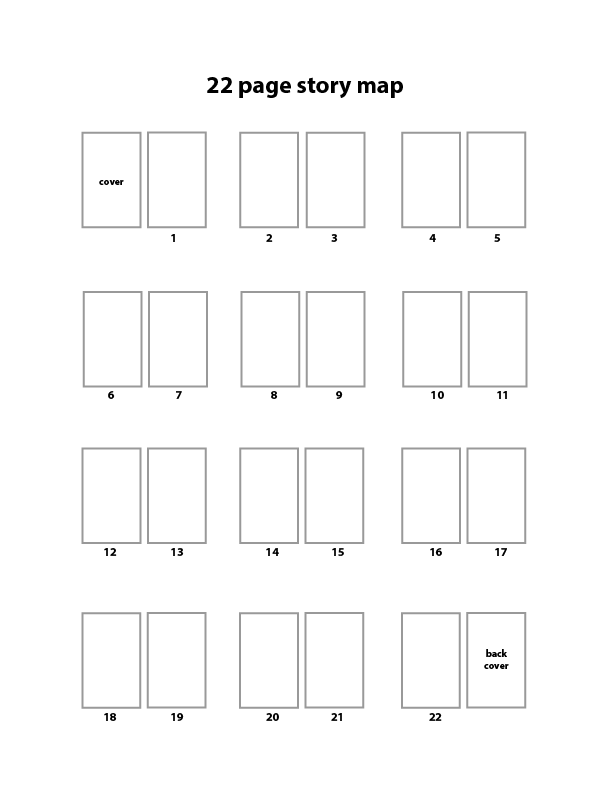
Here’s an example of a story map that he filled out — I’ve seen this particular example used to provide a visual aid for his Writing Comics course. He also hands out blank versions in his class — I scanned one and redrew it in Illustrator because I like doing stuff electronically.
Notice in his example how he’s broken up his story into a five-act story (notice the arrow-ended lines that separate acts) plus an extra 1-page epilogue at the end. Most pages are broken up into three sections (in general, Ty says, a comic page has three story beats).
I like the story map, but I confess that I’m not 100% in love with how it fits (or doesn’t fit) into an overall writing workflow. At the end of a story map exercise, I have an artifact that doesn’t feed in to a script in any way except conceptually. Basically, at the end of the story-mapping exercise, I completely switch tools, and while I can have the story map open in one window, its primary interface to the next tool is via copy-and-paste.
Increasingly, these days, I do my comic-writing using Scrivener and I found myself wondering to what extent I could use Scrivener during the story mapping exercise.
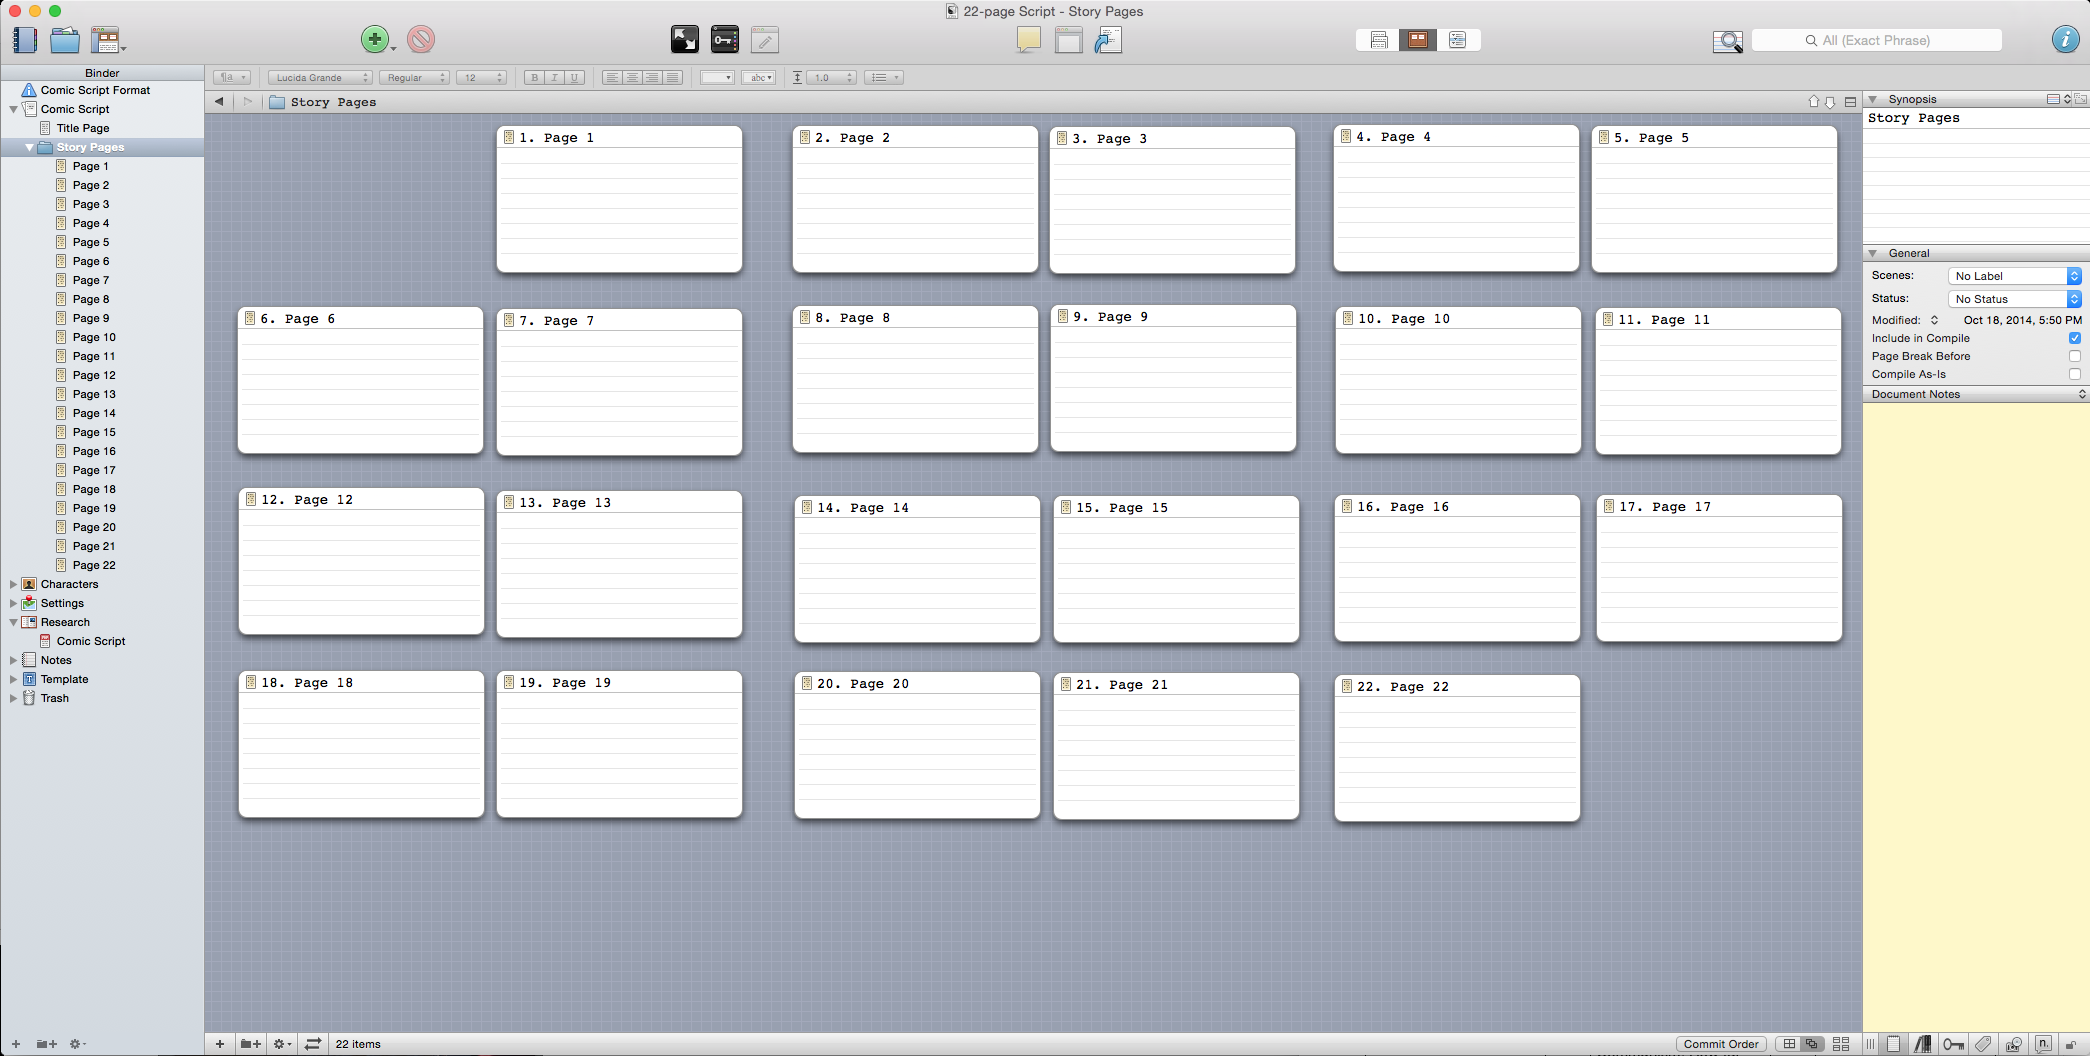 So I sat down one day and worked up a simple Scrivener document. Scrivener has this idea of corkboard view of your story, so I started with that. I lay down one Scrivener Text Document for each page. I also use the “Freeform corkboard” to allow me to lay out “cards” in a meaningful way. In particular, I like the visual representation of which pages face each other.
Next step is to figure out the “acts” or scene breakdowns. Now, Scrivener has a grouping mechanism (basically using folder-like-things), but if I start collecting pages into folders at this point, I’ll lose this high-level view — the freeform corkboard will replace a bunch of “cards” with a “group”. I don’t want that at this point. I want to retain the “one screen view” for a while longer.
 Now, Scrivener has some extra markers called “Labels”. Basically, they’re customizable labels that you can attach to individual cards. By default, Scrivener refers to these “Labels” as “Progress” items and has some progress-based labels pre-defined. But, hey, you can change these. So in my template document, I redefined them to be “Scenes”. Now it’s simple to just right-click on a card (or a few cards) and assign a certain number of pages to a particular scene.

I also tweak some of my Scrivener settings so that my scene labels cause my cards to be colour-coded.
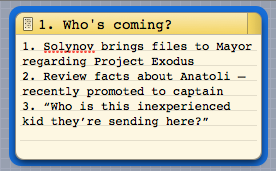 Once I finish scene break-down, I can move on to the next step of the story mapping exercise, and I give each page a concise, high-level description of what takes place on that page. And after that, I can go in to the next stage, which involves breaking out the three story beats for each page.
There’s a next step that Ty taught us, which involves breaking down the story beats further into specific panels, but I don’t tend to go that far. Usually, once I’ve got the page break-down, I’m happy to start scripting. It’s usually at this point that I start grouping individual text “pages” into Scrivener’s folder structure.
So why do I like this approach? Well, basically because my story map is much more tightly bound to the final script. In essence, the story map becomes the start of the script document. I can rearrange stuff to my heart’s content and the original break-down notes move around with the script. That works for me.